|
 | |  |
WATER GILDING ON PANELS
Careful work and great effort should go into the preparation layers. The finished gilding
will magnify any flaws present in the preparation layers..
MATERIALS: (See page on Materials in this gilding section for specific information)
!. prepared gessoed panel
2. drawing media
3. ink
4. metal point
5. bole solution
6. gilding liquid
7. loose leaf gold
8. gilding tools
When working on panel the surface is typically a traditional gesso panel.
(Please see section on GESSO/ GROUNDS...)
The image should be planned out in advance and the gilding carried out prior to any painting.
The image is first drawn onto the surface of the panel. This may be done with any
drawing medium. Traditionally chalk, ink or metal point would have been used. Once the desired
image has been developed it is "set in" with ink. If the original drawing was done with chalk
dust away particles.
Using a metal stylus, a metal point such as an etching needle today, the contour of areas which
are to be gilt should be slightly incised. The gold will be laid such that it overlaps
the desired areas of the image. The incised line will show in the finished gilding and allow the gilder
to recover the desired contour.
Prepare the bole solution, bole solution is a mixture of animal skin glue and gilders clay. See
"Preparations and Recipes" page in this Gilding section. It is typically one part clay and two parts
warm glue. The bole is applied with a soft brush. Traditionally brushes where round but a flat
watercolor brush works very well for this.
The bole is applied in many thin layers with the object of achieving as smooth a surface as possible.
As a preparatory layer add a small amount of the plain bole or gilders clay to warm glue, (just
enough to color the glue) and size, or coat, the area to be gilt.
The preparatory layer will dry very quickly. The bole solution is applied in thin layers first in one
direction and then in the opposite. Apply the bole in smooth even strokes across the panel. Allow
each layer to dry before the next is applied.
The bole solution should be thin enough to flow smoothly. It may thicken and gel at room
temperature. If this happens and a thin layer can not be applied place the container in a warm
water-bath and it will become liquid again quickly.
Apply 5 to 7 thin layers, allow to dry over night.
Sand or scrape smooth. This was done with a metal straight edge, cuttle bone, reeds and many other
materials in the past Wet dry sand paper 200 to 600 works well.
Polish the bole with a piece of linen or burnish it smooth. If burnishing is chosen reserve a
burnisher for this purpose only as this burnisher will not be safe for use on gold. The bole layer
should be free of any brush marks, scratches, irregularities or flaws of any kind. The gilding will
look only as good as the bole layer looks.
When the bole layer is perfectly smooth and polished it is ready for the gilding.
Prepare for the gilding by laying out the tools, cotton balls, gilding liquid, cushion and gold leaf
next to the panel. Prepare the tip by rubbing a little petroleum jelly on the back of your hand and
running the tip across it, traditionally gilders ran the tip across their hair or forehead for the
purpose of getting a small amount of oil onto it to assist in picking up the gold. Do not get it greasy.
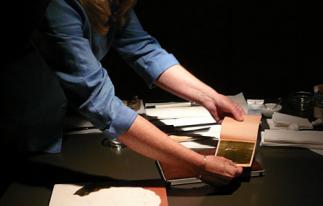
Never touch the gold leaf with your fingers! Use tools for this purpose.
It is difficult to lay a whole leaf of gold. Cut the leaf in half or in quarters. To do this open the
booklet of gold, holding the pages together with the fingers very quickly flip it over depositing
one leaf onto the cushion. If it does not lay flat adjust it with the gilders knife. With the leaf
perfectly flat on the cushion lay the knife blade straight edge down across the leaf and pull it with
some downward pressure toward yourself. Lift the knife, turn it flat and with downward pressure
slide it under one half of the cut leaf. When the knife protrudes from the other side of the leaf lift
up and move the leaf. Deposit the gold back onto the cushion.
To lay the leaf wet an area of the bole a bit larger than the piece of leaf with the gilders liquid using
a soft brush. The liquid must form an even, uninterrupted surface standing up on the bole layer.
The leaf will not adhere to any areas which develop dry or open spots. If these develop re wet the
area.
Using the tip (see section on gilding tools) pick up the piece of leaf and lightly lay it onto the wet
bole in a single quick tap motion. The leaf will be sucked down on to the bole. Do not get the tip
wet, it must be dry or the gold will stick to it. Do not worry about wrinkles they will burnish out.
Do not worry about flaws or mistakes they must be repaired later.
Work in a systematic pattern. Wet the adjacent spot and lay the next piece of leaf. Avoid wetting the
leaf already on the panel as you proceed, it will stain. Slightly overlap the leaf to avoid gaps. After a
fewleaves have been laid go back and tap down the first one in a straight up and down motion with
a cottonball.
Allow the gilding to dry completely before proceeding!
Brush away the excess gold with a soft brush.
Repair flaws, this is called "faulting". Use a small brush, wet exposed bole and lay leaf over it. Press
down if necessary with cotton ball. For tiny faults pick up a tiny bit of leaf with tweezers or a small
water color brush.
Burnish as soon as possible once dry. It may be difficult to tell when the gilding is dry and the time
necessary varies according to temperature and humidity. To test tap the dry un-gilded areas of the
panel with a burnisher and listen to the sound. Tap the gilding, if it is wet it will sound dull by
comparison if it is dry it will make the same bright or high sound.
To burnish run the burnisher lightly across the dry gold. Work in a systematic pattern as strokes will
show. If the burnisher runs smoothly across the gold gradually increase pressure. Burnish to desired
brilliance.
To "Double Gild" which is necessary for really perfect gilding, repeat process once first gilding is
complete. Be sparing with the gilders liquid. Burnish when dry.
|
|
| |