WATER GILDING
The gilding technique known as water-gilding is typically used in combination with
egg tempera painting on panel. The areas on the gessoed panel to be gilded
are coated with a glue clay mixture called bole. When dry the bole layer is burnished
smooth. Gold, in leaf form, is adhered by wetting the surface and letting capillary
action draw the gold down into place where the water reactivates the size, which
dries, fixing the gold in place. Gilding should be done prior to any painting.
MATERIALS
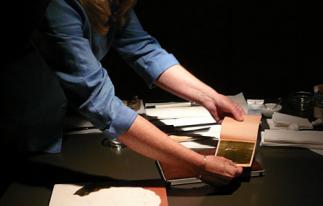
Gold leaf- Loose sheets of beaten gold, (not patent gold which is stuck to tissue), sold in
booklets of 25 sheets.
Bole- Armenian bole or gilders clay, (usually red can be yellow, grey) can be purchased in
lump form or as a paste. Paste is recommended.
Note: bole also refers to the prepared mixture of the clay and a size binder
Rabbit-skin glue, or hide glue- gelatin like adhesive from skins or bones of animals or
traditionally from parchment clippings. Available at art supply stores in dehydrated form.
Size- rabbit-skin glue prepared for use as preparatory coating for a priming layer on panel or canvas.
Gesso- Plaster like preparatory ground layer for painting or gilding made from size and an inert filler.
Gesso sottile- Gesso made from slaked plaster.
Slaked plaster- Roasted gypsum (plaster of Paris) treated so it can not set when mixed with water.
Inert fillers- dry ground chalk, gypsum, slacked plaster, alabaster…
Glair- liquefied egg white.
Drawing ink
Alcohol
TOOLS
Gilders Tip- A flat brush with hairs in a single flat row the with of a leaf of gold used to move gold leaf.
Gilders Cushion- Flat cushioned surface used to cut and lay out leaf.
Burnishers- tool of agate stone or hematite today used to polish gold.
Gilders knife- flat, spatula like knife free of irregularities used to cut gold on the cushion.
Cheese cloth
Bowls
1 inch smooth flat brush
Large flat brush
Metal point
Cotton balls
Fine sandpaper
RECIPES
Rabbit-skin glue- measure out dehydrated glue, by dry weight, mix at ratio of 1 ounce glue to
14 liquid ounces water, let sit over night. Glue will soak up water. Heat in double boiler until liquid.
DO NOT BOIL THE GLUE.
Bole mixture for use- 1 part gilders clay to 2 parts rabbit-skin glue.
Gilding liquid- 4 parts water to 1 part alcohol add a tiny bit of rabbit-skin glue. (For 4 ounces of water
add glue equal to the size of a hazel nut.)
TECHNIQUES
Application of Bole
1. Draw image on panel, ink it in, trace outlines with metal point.
2. Apply prepared bole in thin, smooth layers to areas where gilding is desired.
Allow each layer to dry before application of next. You may sand or burnish the surface
between layering if you wish.
3. Dry 24 hours, burnish surface.
Gilding
1. Prepare gilding tools for use; lay out near work to gild. Have gilding liquid, brush, cotton balls
2. Lay out leaf on cushion.
3. Cut leaf to size with knife. Gold should be cut into squares or rectangles only. Do not attempt
to cut intricate shapes. The gold will adhere only to the bole, creating desired shapes. The excess
gold will be brushed away when dry.
4. Wet area to gild with gilding liquid.
5. Pick up leaf with tip.
6. Quickly set leaf onto wet area (if liquid dries re-wet the area, it must have thin surface of water
to cause leaf to adhere) and draw up tip, avoid wetting it.
7. Continue setting leaf in a neat order.
8. After you have set a few pieces in place go back and lightly tap down previous pieces with cotton
ball to make sure they are in contact with the surface.
9. ALLOW TO DRY…..RESIST THE URGE TO TOUCH ANYTHING.
10. When dry dust away excess gold.
11. Burnish, or polish, with a burnisher. Start slowly with very little pressure. Work in an orderly pattern as the
burnishing pattern will show in the way light reflects off the surface.
|